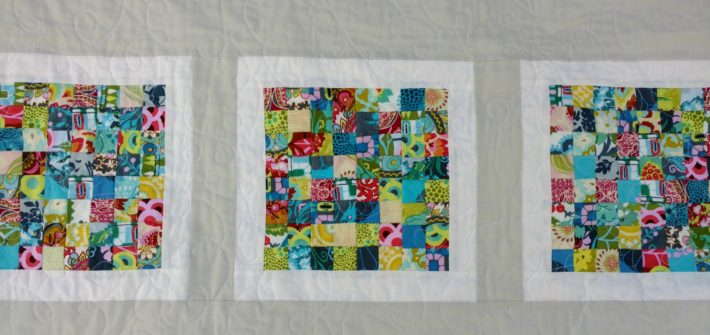
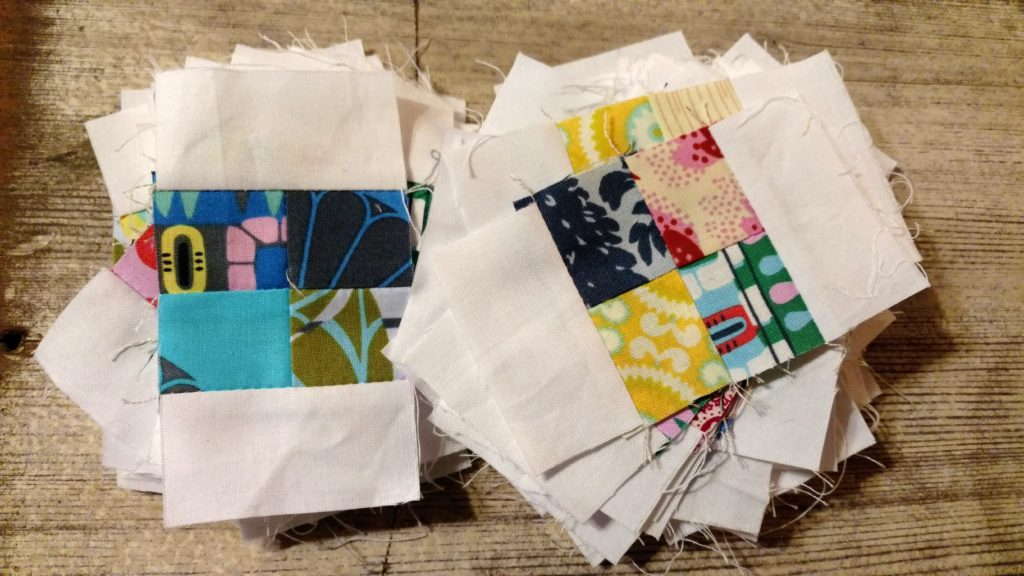
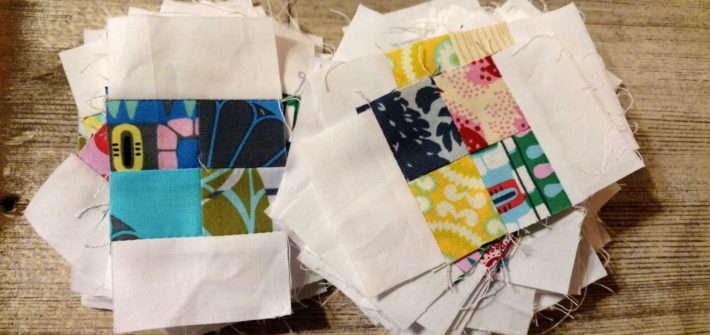
After a disastrous start, the tiny scrap quilt is finished. Having to redesign a project can be stressful. However, I’m glad I wasn’t happy and stepped back for a few days. Removing the white binding around the four square block was the right idea. I combined the four squares to make an 8 x 8 larger block.
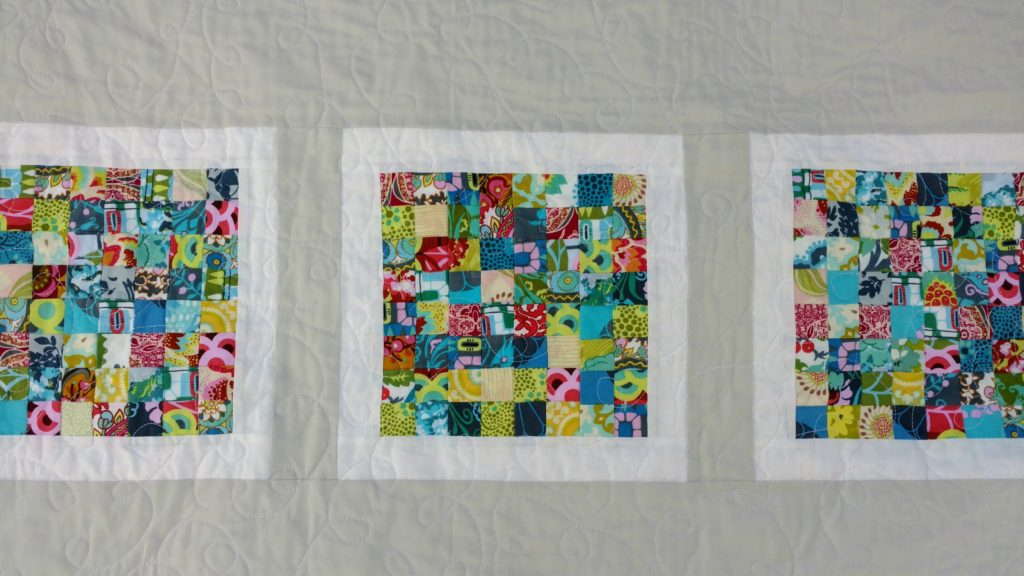
I then a 2 inch white border was added on all sides of the block. The new frame in white is more proportional to the block from the original idea.
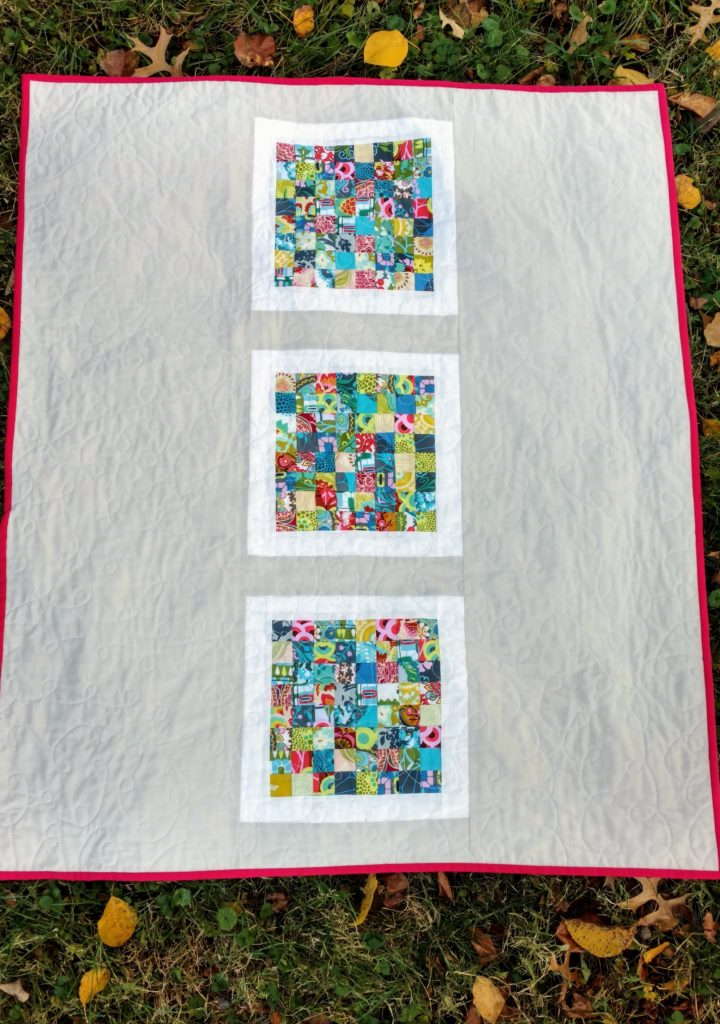
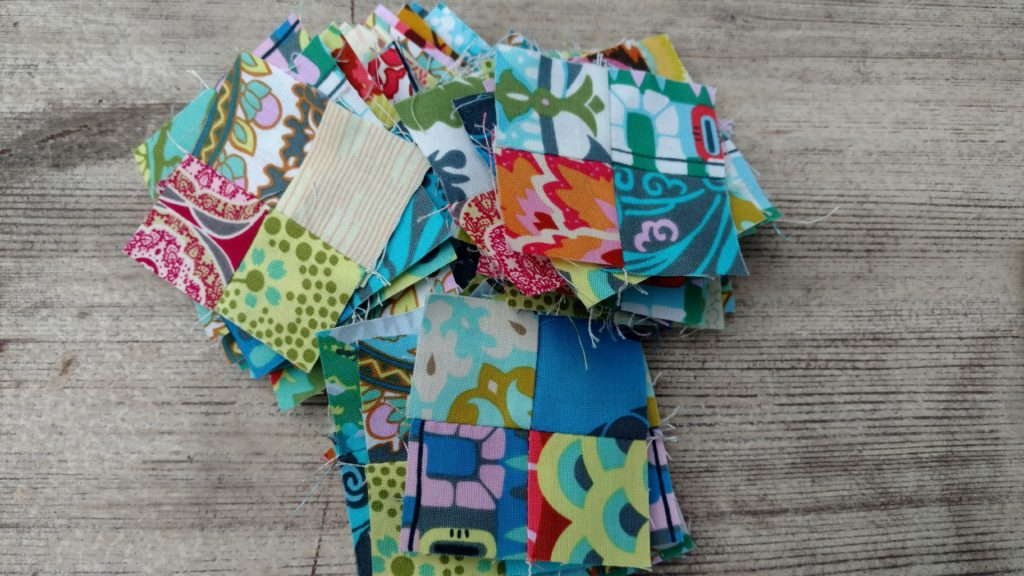
I had always envisioned this quilt floating in a light Kona Ash gray. It’s the perfect color to distract from the boldness of the Cameo scraps.
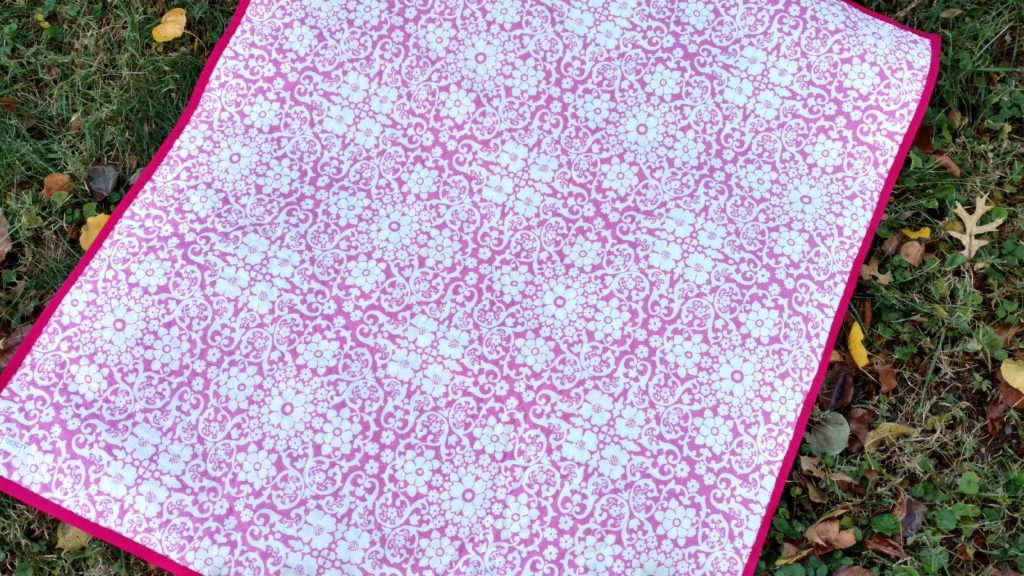
For the quilting I went with free motion quilting in an overall loops pattern. My husband timed me and it took 40 minutes. Holy camoly, can you believe that? While digging through my stash during my clean out I found the backing print. I thought it would be a nice compliment.
Bonus was finding Kona Pomegranate already made into binding. This quilt is all scrap and stash. Happy dance.
It’s now ready to head to it’s new home and snuggle a baby girl.
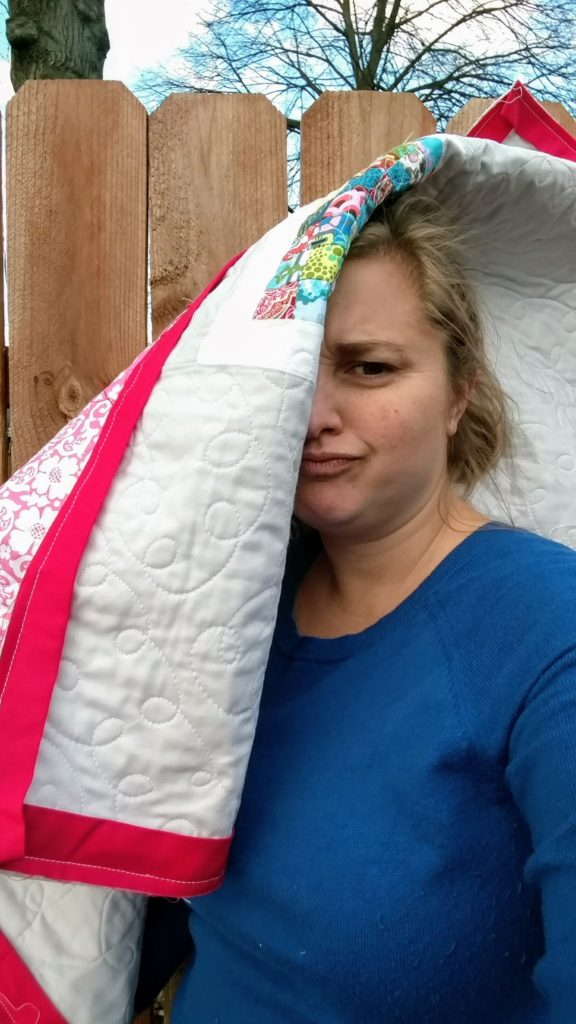
While trying to get some photos the other day, this happened. The quilt fell over onto my head as I was taking a picture. Real life.
The photo I did end up posting on Instagram was a hit. Thank you everyone for your comments and suggestions throughout this process.
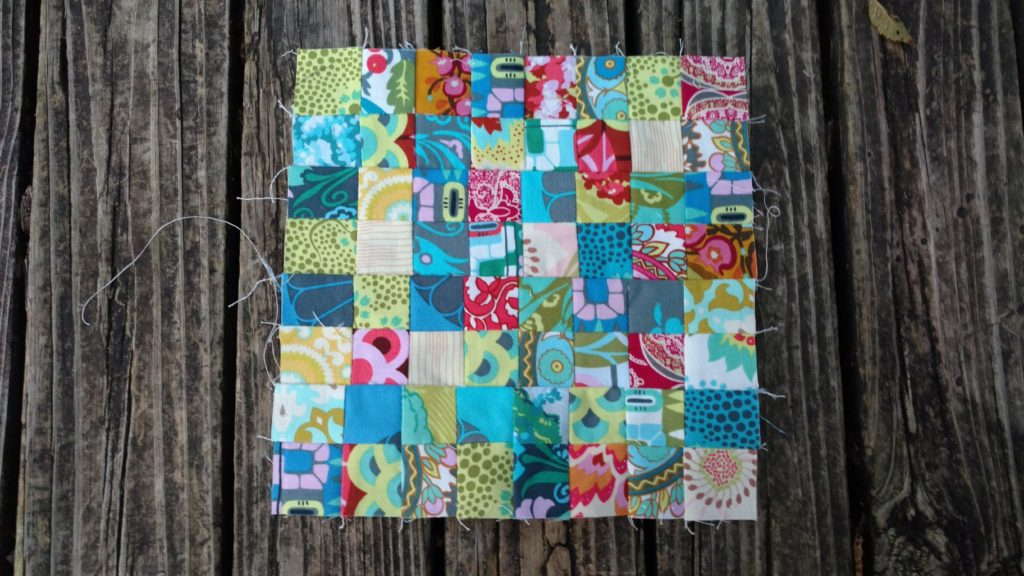
There could be multiple updates on this project since I’m just not feeling the overall design. Over the weekend I was prepared to add white around the blocks that I had already pieced. I was going to buzz right through them and then add a gray border.
Well I buzzed right through them and then went to press the seams. Reality set in.
The truth is I hate that white border now. I was only able to add to two sides and after pressing I stopped. The white is drowning out all the color in the tiny blocks. I wanted it to create a frame.
For now I have not ripped off the white strips, but it is very tempting. Another idea is floating around in my head that I may try.
Creating with no pattern
Since I like to freehand create quilts and let them develop organically, this happens quite frequently. Typically, I can work through the design and be happy with the results. When a quilt has no pattern, I get to stretch myself creatively. Improvising challenges me to work through the creative process. It can be frustrating to hit many roadblocks, but I’m not going to put out a quilt that I’m not pleased with.
Further ideas
I have been contemplating the next steps for a couple of days. One design that I keep envisioning is more simple. Rather than frame the little squares in white, let’s skip that portion and just frame in gray. From there I would float the framed squares around the quilt. Maybe this needs to be bigger than a baby size to play with scale more. Check back next week to see where I have taken this project.
Woodland animals have been a trend for some time in nursery decor. Amazingly, this is the first baby quilt I have made with that theme. My husband says it doesn’t look like woodland creatures and I’m okay with that. It’s there, but you have to look closely.
Inspiration
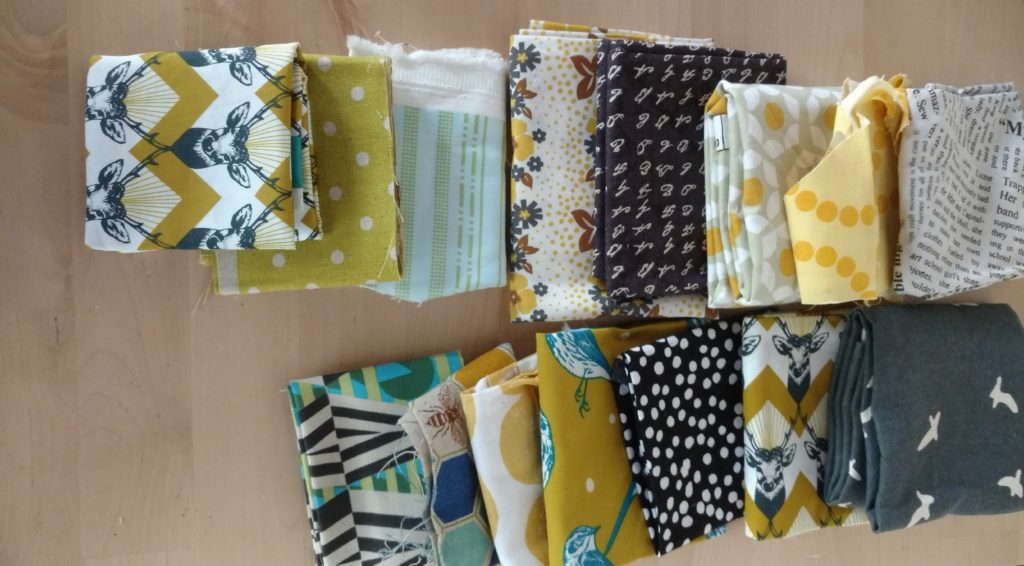
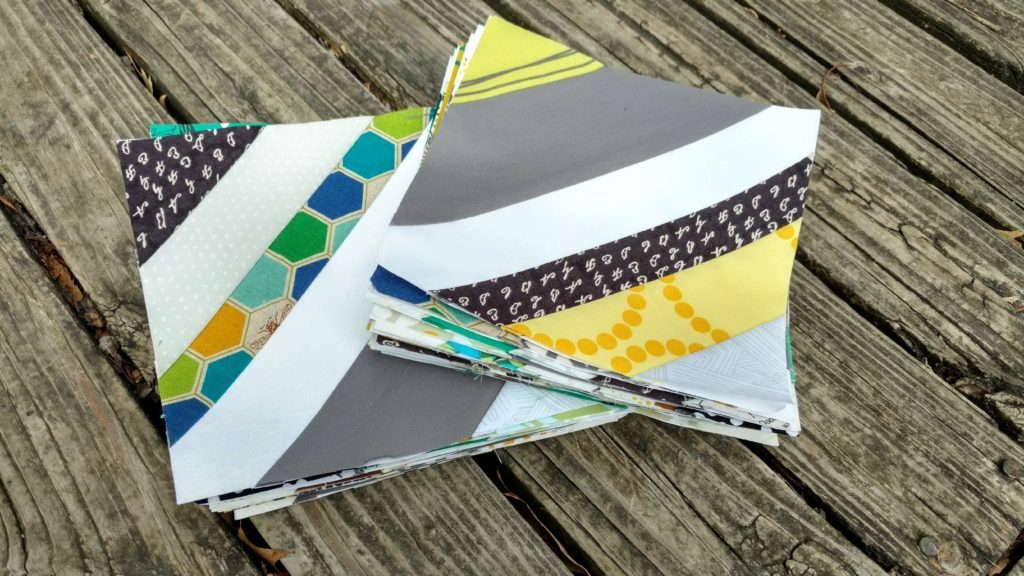
Scrap packs from Crimson Tate were purchased months ago. When my client suggested outdoors and animal for a boy, these fabrics immediately came to mind. I had envisioned a string quilt when I first picked up the bundles and the idea had not faded.
Posing on Point by MyTeaandBrie was quilt design inspiration. While I didn’t use her tutorial, I use more of the general layout. Note: the mailing list request is for My Tea & Brie, not my site.
I pressed and starched all my fabrics before cutting.
For my blocks I cut the following string sizes:
Center white strip: 2 inches
Grey strip: 3 inches
Other fabrics 1.5 or 2 inches in width
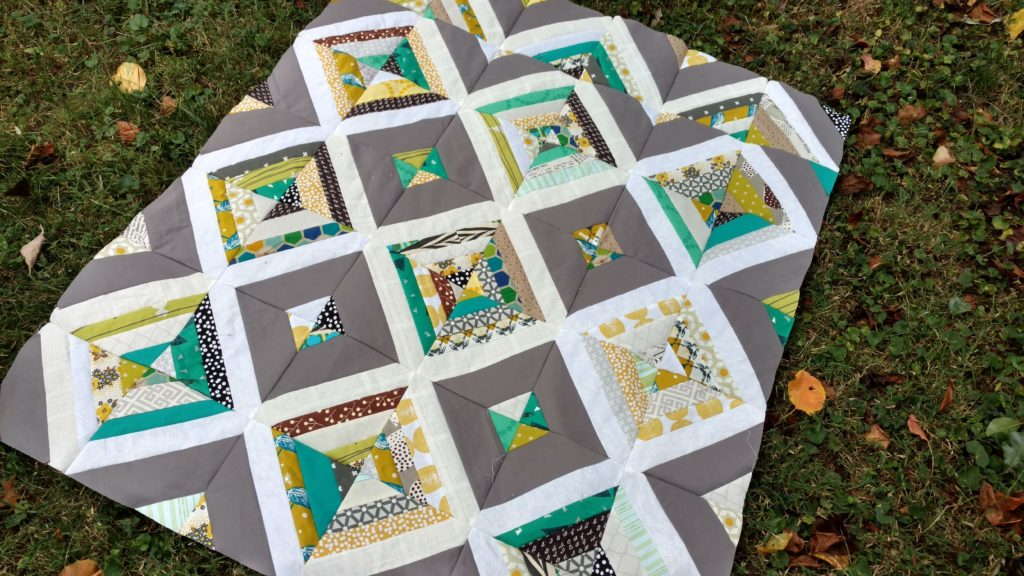
Ready to chain piece this batch
Chain piecing the blocks made it pretty easy to bust the top out. I worked in 30 minute chunks then took a break. Tip: keep the iron nearby to make chain piecing more efficient.
Layout
In laying out the quilt top I was not overly picky about where things went. An effort was made to keep too many colors from the same square. Overall, it turned out great.
After completing the top, it was time to rip off all the little papers from the back. My mother-in-law was in town for Fall Break. I asked if she wanted to help and she joined in. It was great to have someone help out, this part was going to take forever and I was on a deadline. If I could get it to the client by X date, they could hand deliver. Well, I had to get this sucker quilted and bound quickly to make that happen.
Quilting, Backing, and Binding
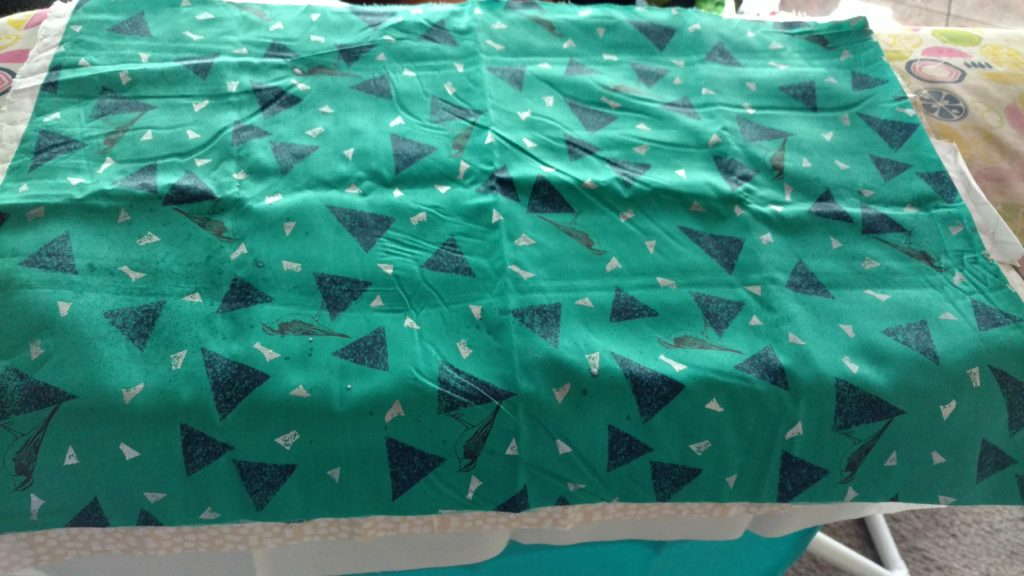
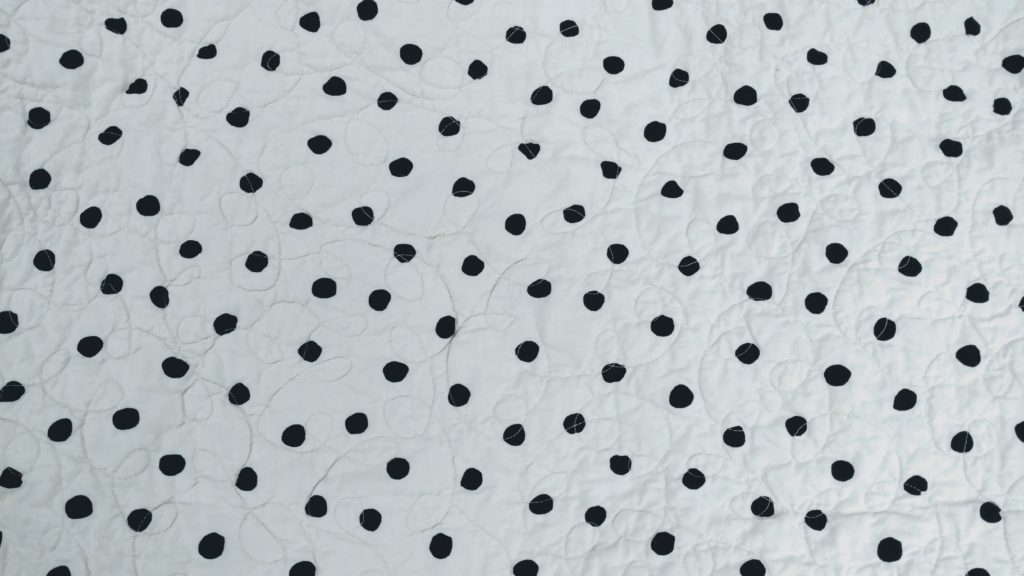
A couple of backing options were auditioned but this black and white dot ultimately won. Doesn’t it play well with the front?
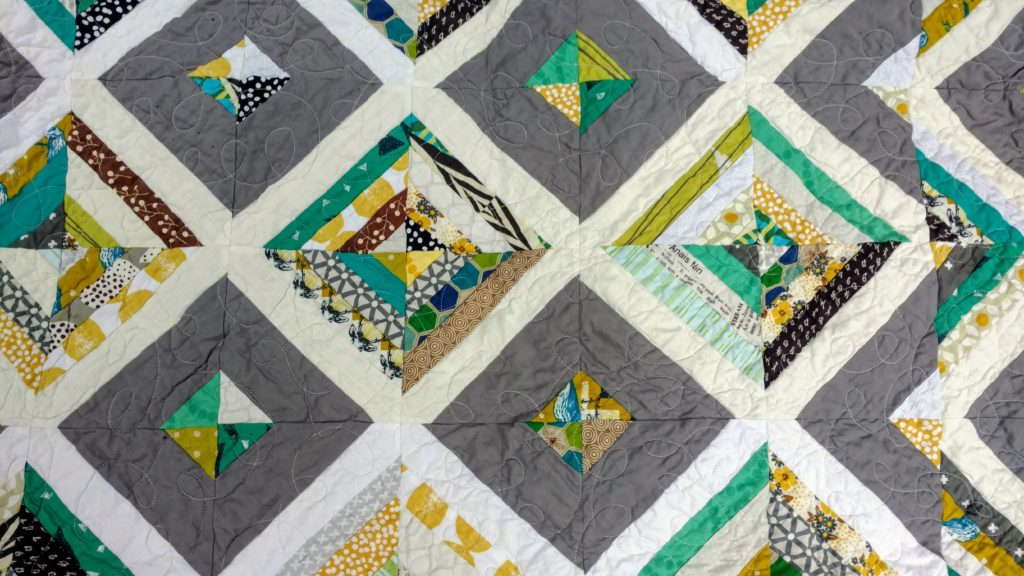
In the effort to meet my looming deadline, free motion quilting with loops won for quilting. Seriously the quilting took an hour. My mother-in-law and husband were watching something while I knocked this out. They were surprised when I entered the room with the quilted piece. I was pretty proud of myself.
However, while I was quilting, I found an error in my quilt. Can you spot it? If you’re a quilter probably, but most didn’t notice it. There was a frantic post to my guild’s page and texts to a couple of friends. The consensus was it’s a design element. Ha! If I wasn’t almost done with the quilting when my eye caught it I would have fixed it. Sometimes you have to let the little things go and accept them. It wasn’t the way I envisioned the quilt turning out, but it works.
Deep in my stash was the gray houndstooth flannel. The piece I had was just enough to bind the quilt. Everything to make this quilt was scraps or stash fabric which is a positive in my book. Makes working against that looming deadline even better.
After thoughts
Pretty sure I want to remake this quilt in a bigger size to keep. The colors are lovely, I am digging the jade. Despite a tight deadline, the quilt made it to CA in time to be hand delivered. The precipitant loved it. Making a baby quilt that doesn’t scream baby is always nice too.
If you like the quilt, save it Pinterest for future reference. I have it under Scrap Busting Projects.
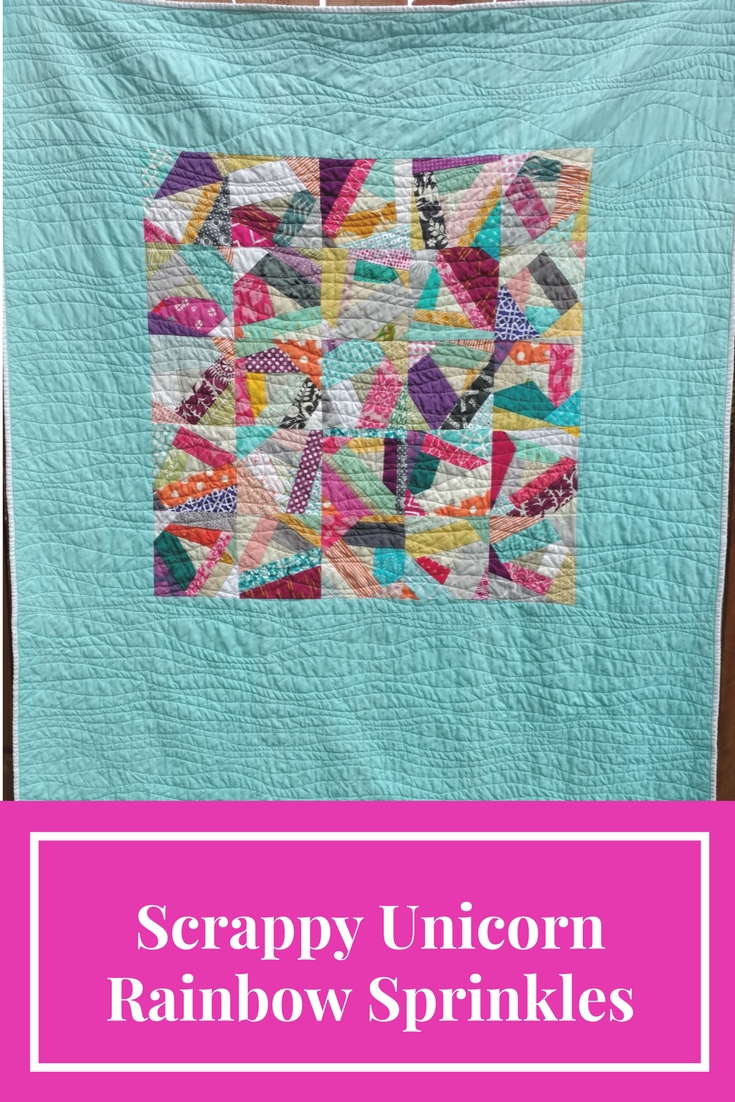
Thanks for coming over to my blog from the Blogger’s Quilt Festival. I’m Tisha of Quiltytherapy. Sewing is my therapy and the only creative outlet I’m good at. Unless stick figures can be a creative outlet, ha! Making quilts from scraps and my stash is what I strive for. Scrappy Unicorn Rainbow Sprinkles is a combination of scraps and pieces from my stash.
It’s hard to truly have a favorite quilt, but this one is in the top 10 that I have created. It is still for sale on Etsy here.
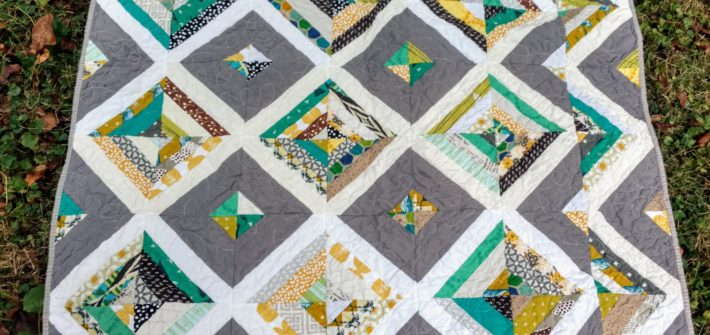
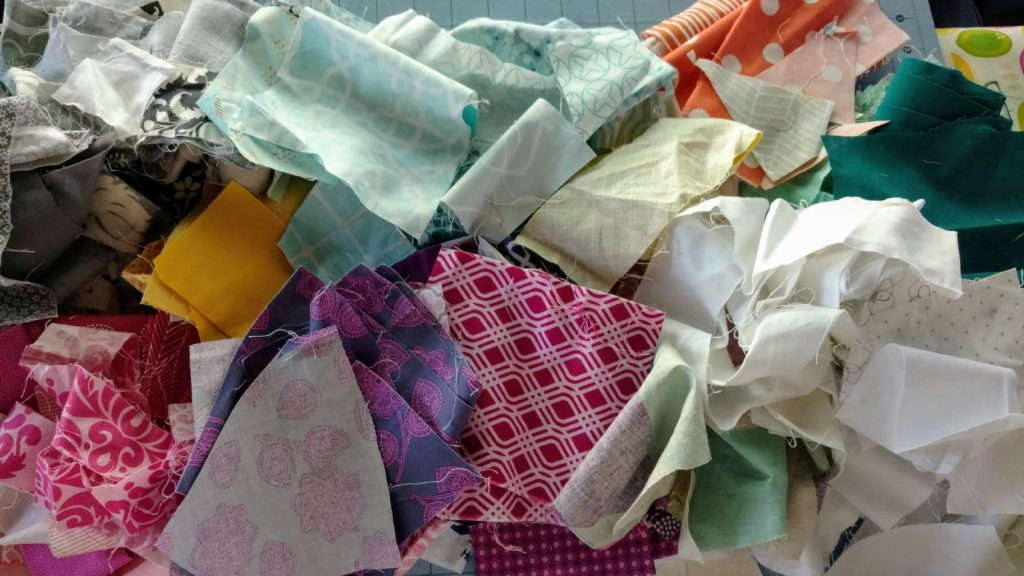
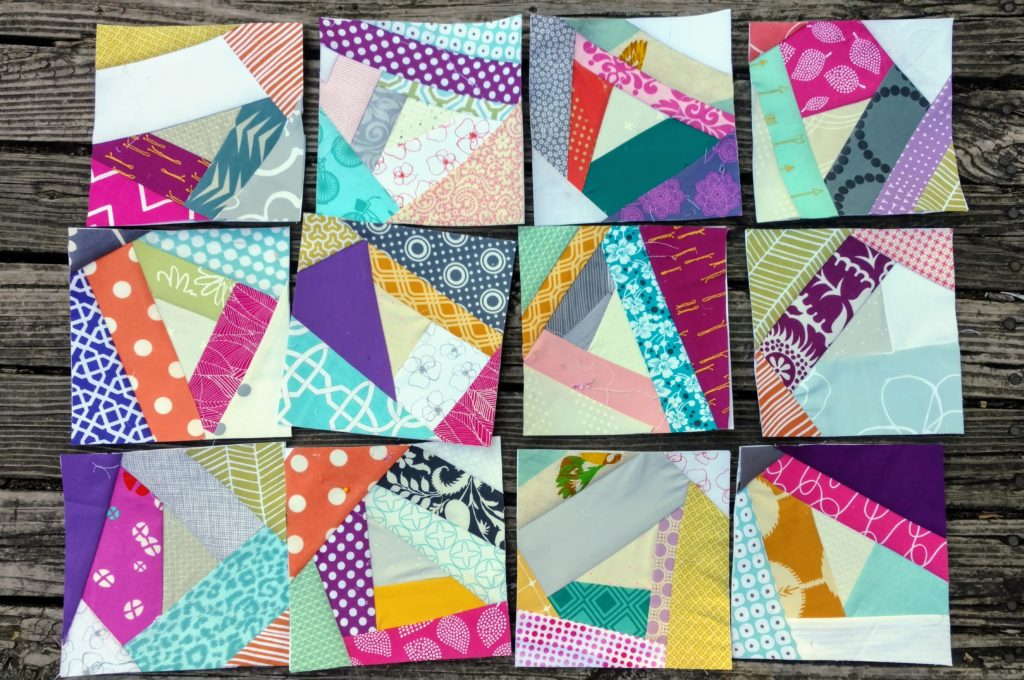
The center blocks are paper pieced using scraps from my guild members. Center triangles are trimmings from Lindsay’s quilt she made during our Winter Retreat. Erika and Lisa brought bins of scraps that they let us raid. I had pulled some scraps together in this color palette before the retreat but their generousity rounded out my collection.
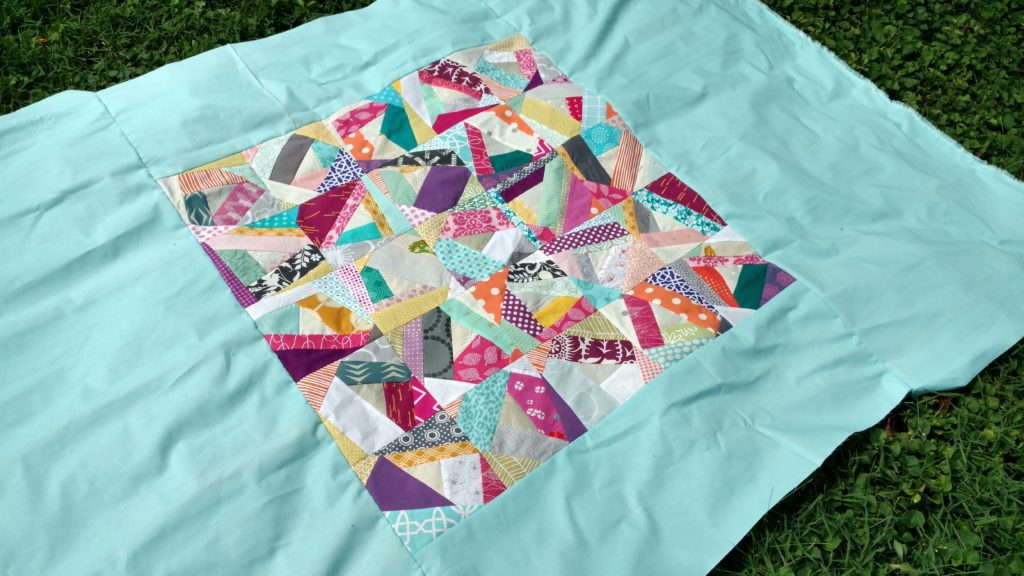
While I wanted to make the entire quilt out of the blocks, they started to look too similar. In my stash was a bolt of Kona Robin’s Egg blue that really brought it all together.
Look for a tutorial on paper piecing these scrappy blocks to make your own version.
This was the second time I ever quilted the organic wavy lines. It created so much crinkle once it was washed. The purple polka dot binding is perfection. As I noted in my original post about this quilt, I hope it leaves behind a trail of rainbow sprinkles wherever this quilt goes.
Read more about creative process with Scrappy Unicorn Rainbow Sprinkles here and here.
Need an easy baby quilt? Dig into your scraps and let’s get started.
If you have been a reader for a while, you may know that I keep my scraps in tubs until it’s time to sort them. Well, my solids are kept separate and they were getting out of hand. The drawer could no longer even be stuffed close. It was time to make something again.
Inspiration
Nothing was really speaking to me, so I headed to my Modern Quilting Inspiration Pinterest board for ideas.
An older quilt from Red Pepper Quilts caught my attention. Rita’s version can be found here. This is a step by step guide on how to create my version.
Design
Tip: Without different hues and saturation, the quilt could run together.
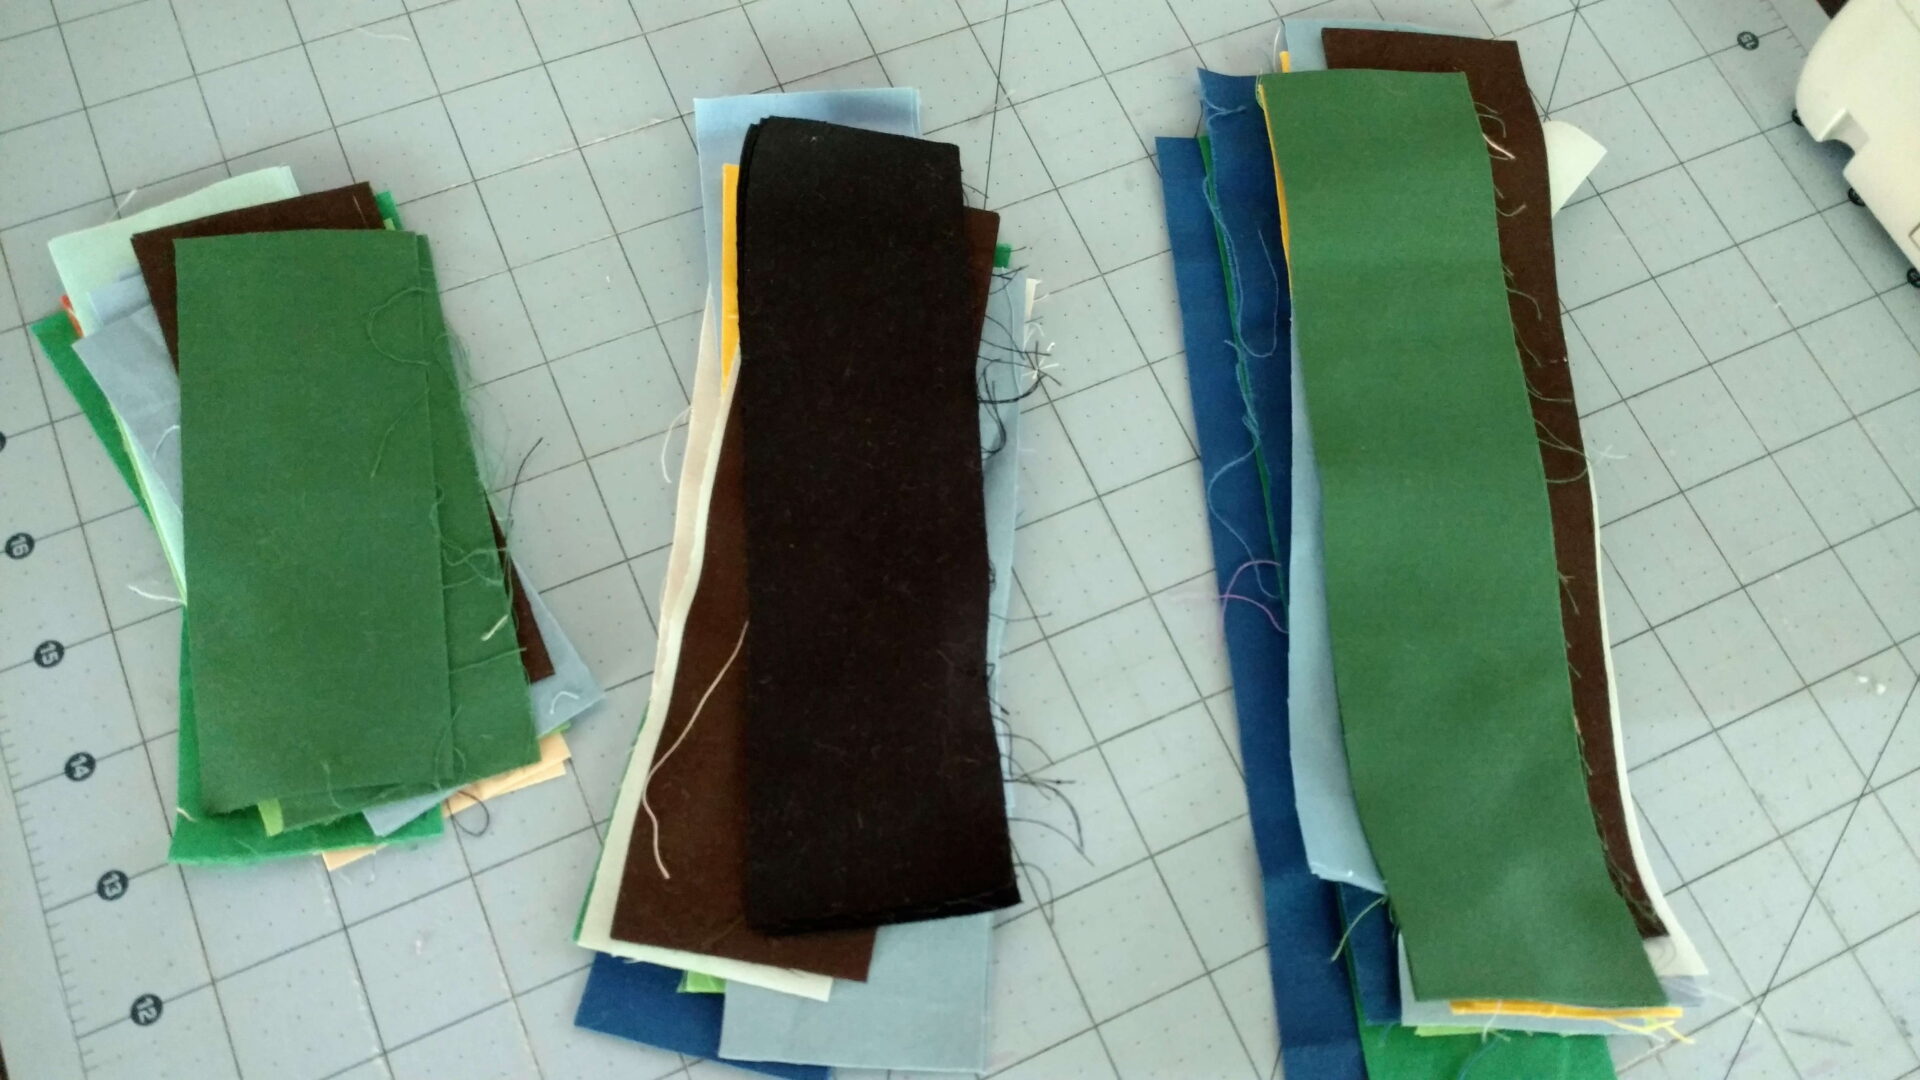
Off to the scrap bin I went to start gathering strips to make my version. I was able to collect many strips and have the variety of colors/saturations I desired. However, I didn’t have many long strips like the inspiration quilt.
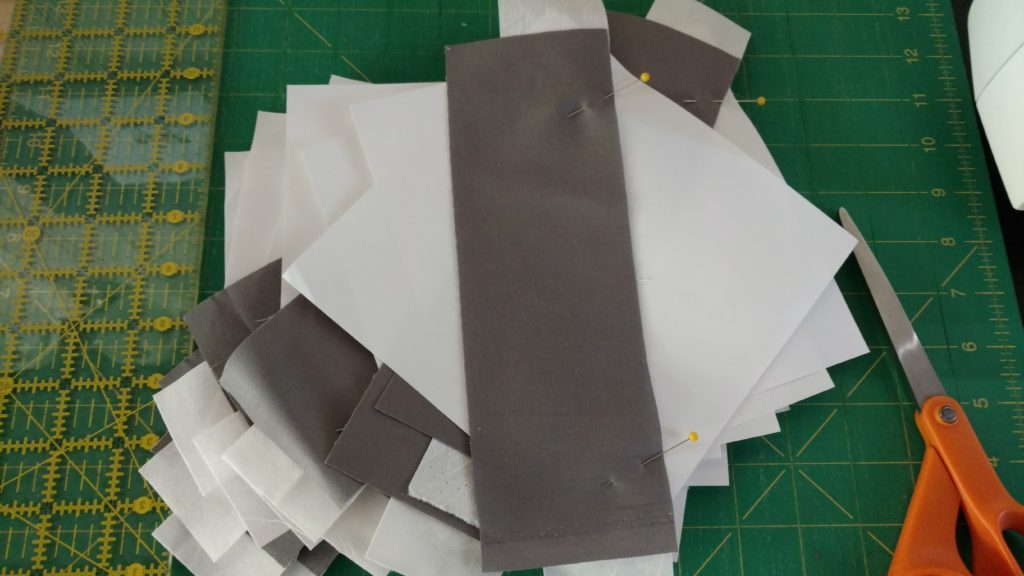
Based on my scraps I could create strips in 2 inch width to get the most from my pull of fabrics. The lengths would be 5, 7, and 9 inches. Feel free to create based on what you have in your scraps.
Each size stack was sorted yet again by color. Orange, yellow, blue, green, brown, black, neutrals, and gray. Sorting will help when piecing. I wanted to avoid having too may of the same color right by each other.
Piecing
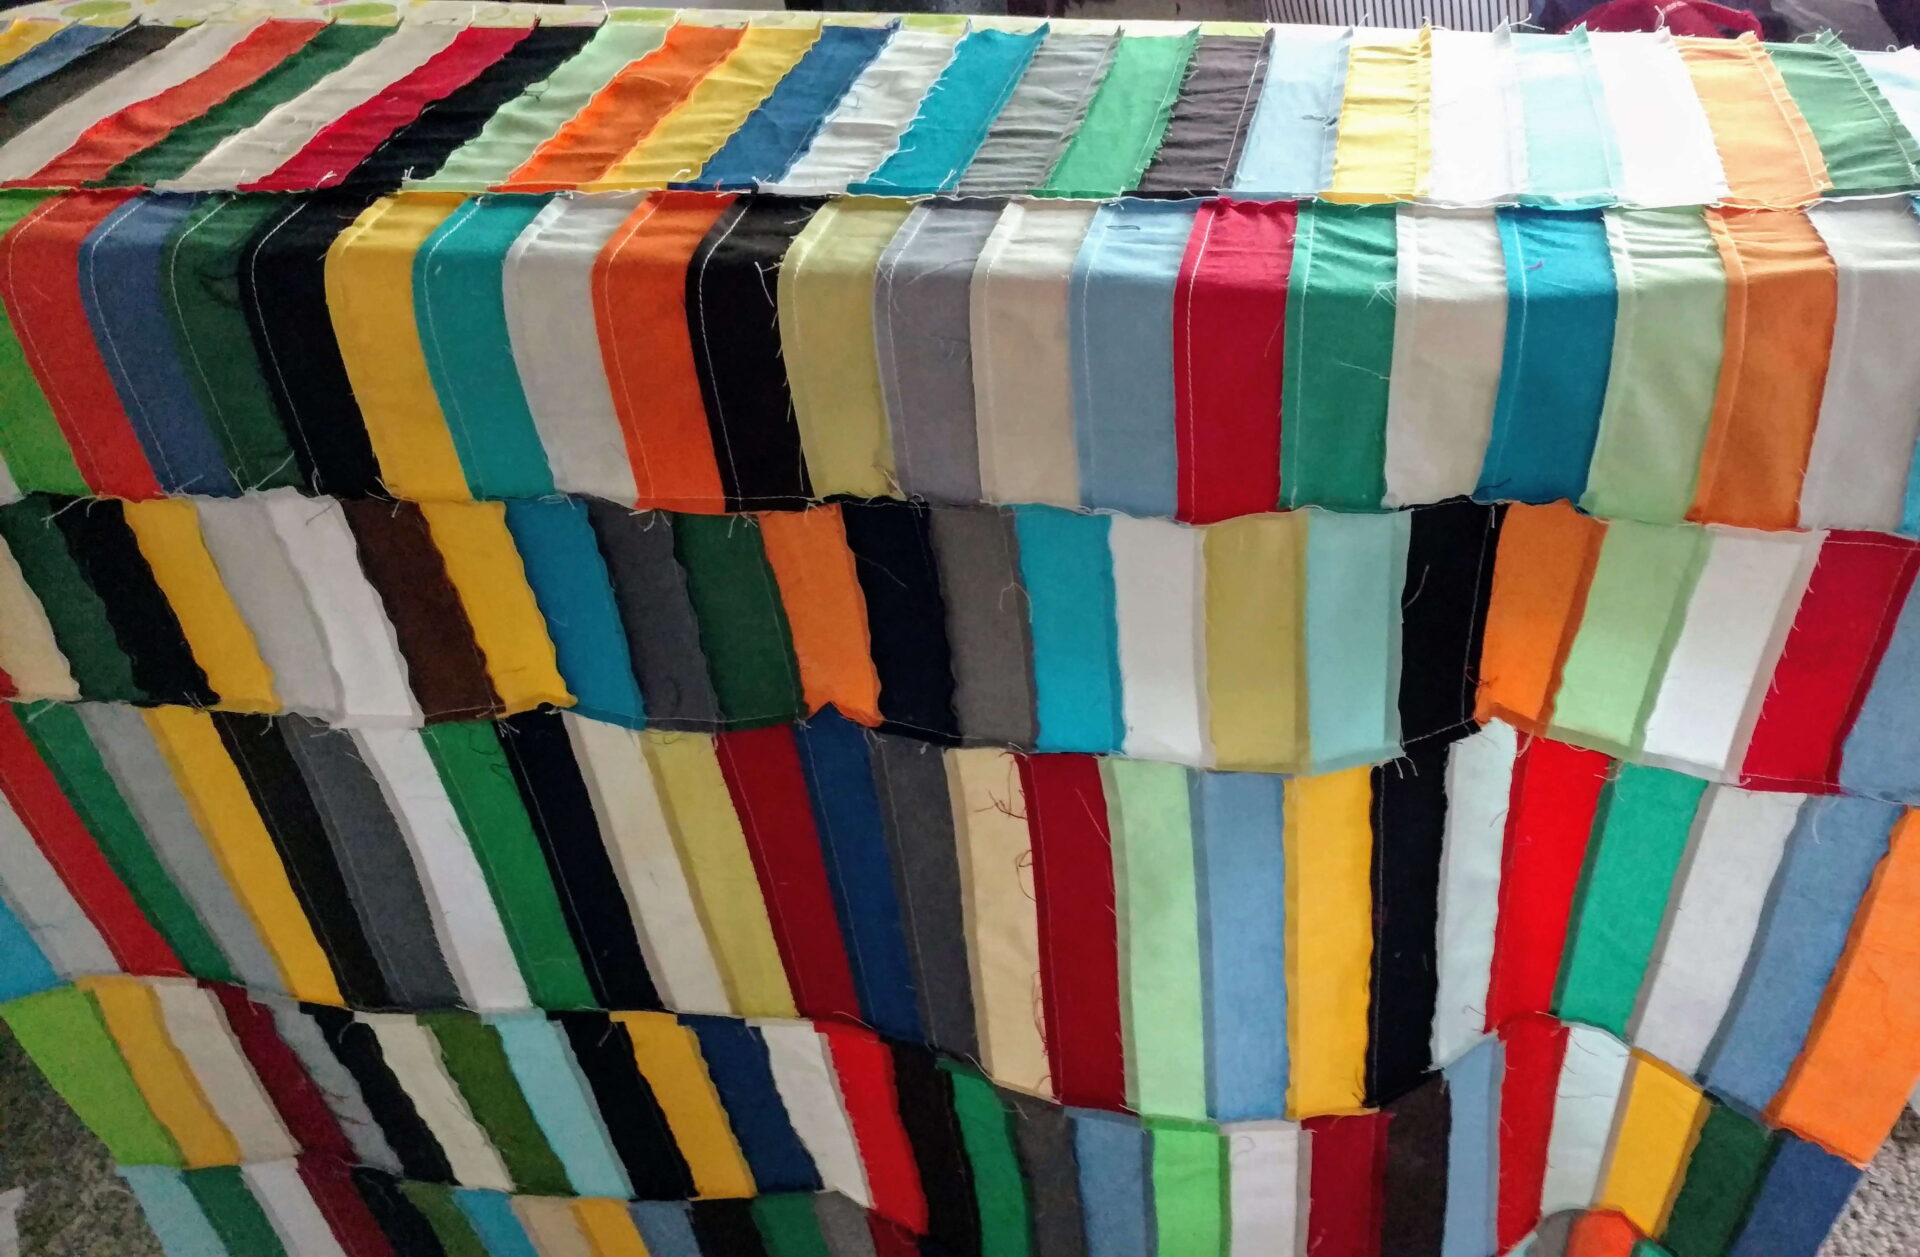
Grab randomly from each pile and begin piecing two strips together of the same size. Rows include 28 strips, or 14 pairs, to make a baby quilt size. Piece all 5 inch strips first. Starch and press the seams all going one direction. Next the 7 inch strips. Starch and press the seams all going the same direction. Finally, the 9 inch strip set. Sew and press in the same manner. Nestle the seams of the 5 inch row and 7 inch row together, pin if needed. Sew the rows together. The outcome is randomly placed colors without overthinking the process.
My version goes in this order: 5 inch, 7 inch, 9 inch, 5 inch, 7 inch, and 9 inch. If you wanted a little larger baby quilt, you could throw another 5 inch row after the last 9 inch row.
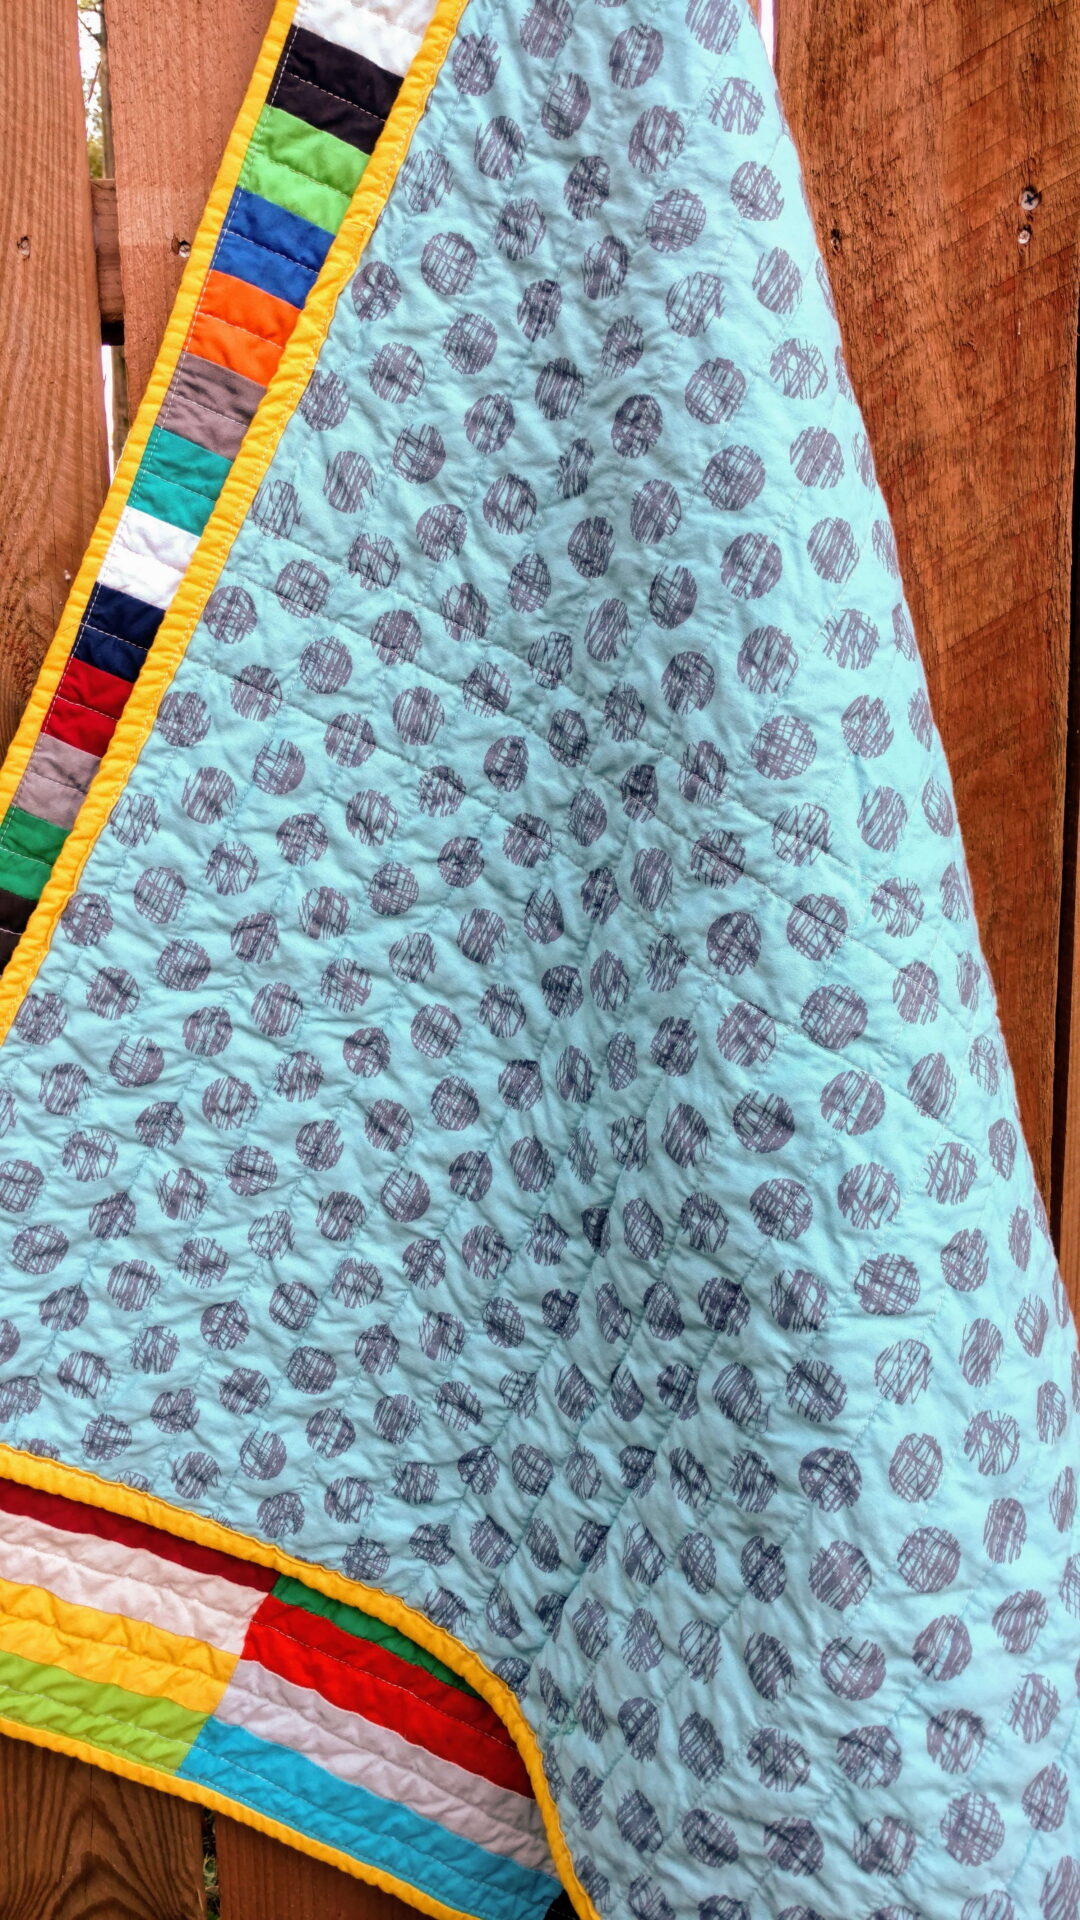
I starched the top and pressed my row seams open. The backing is a blue print I picked up a few months ago when a local quilt shop was closing out their inventory. With this size quilt, I only needed a yard of the fabric.
Quilting and Binding
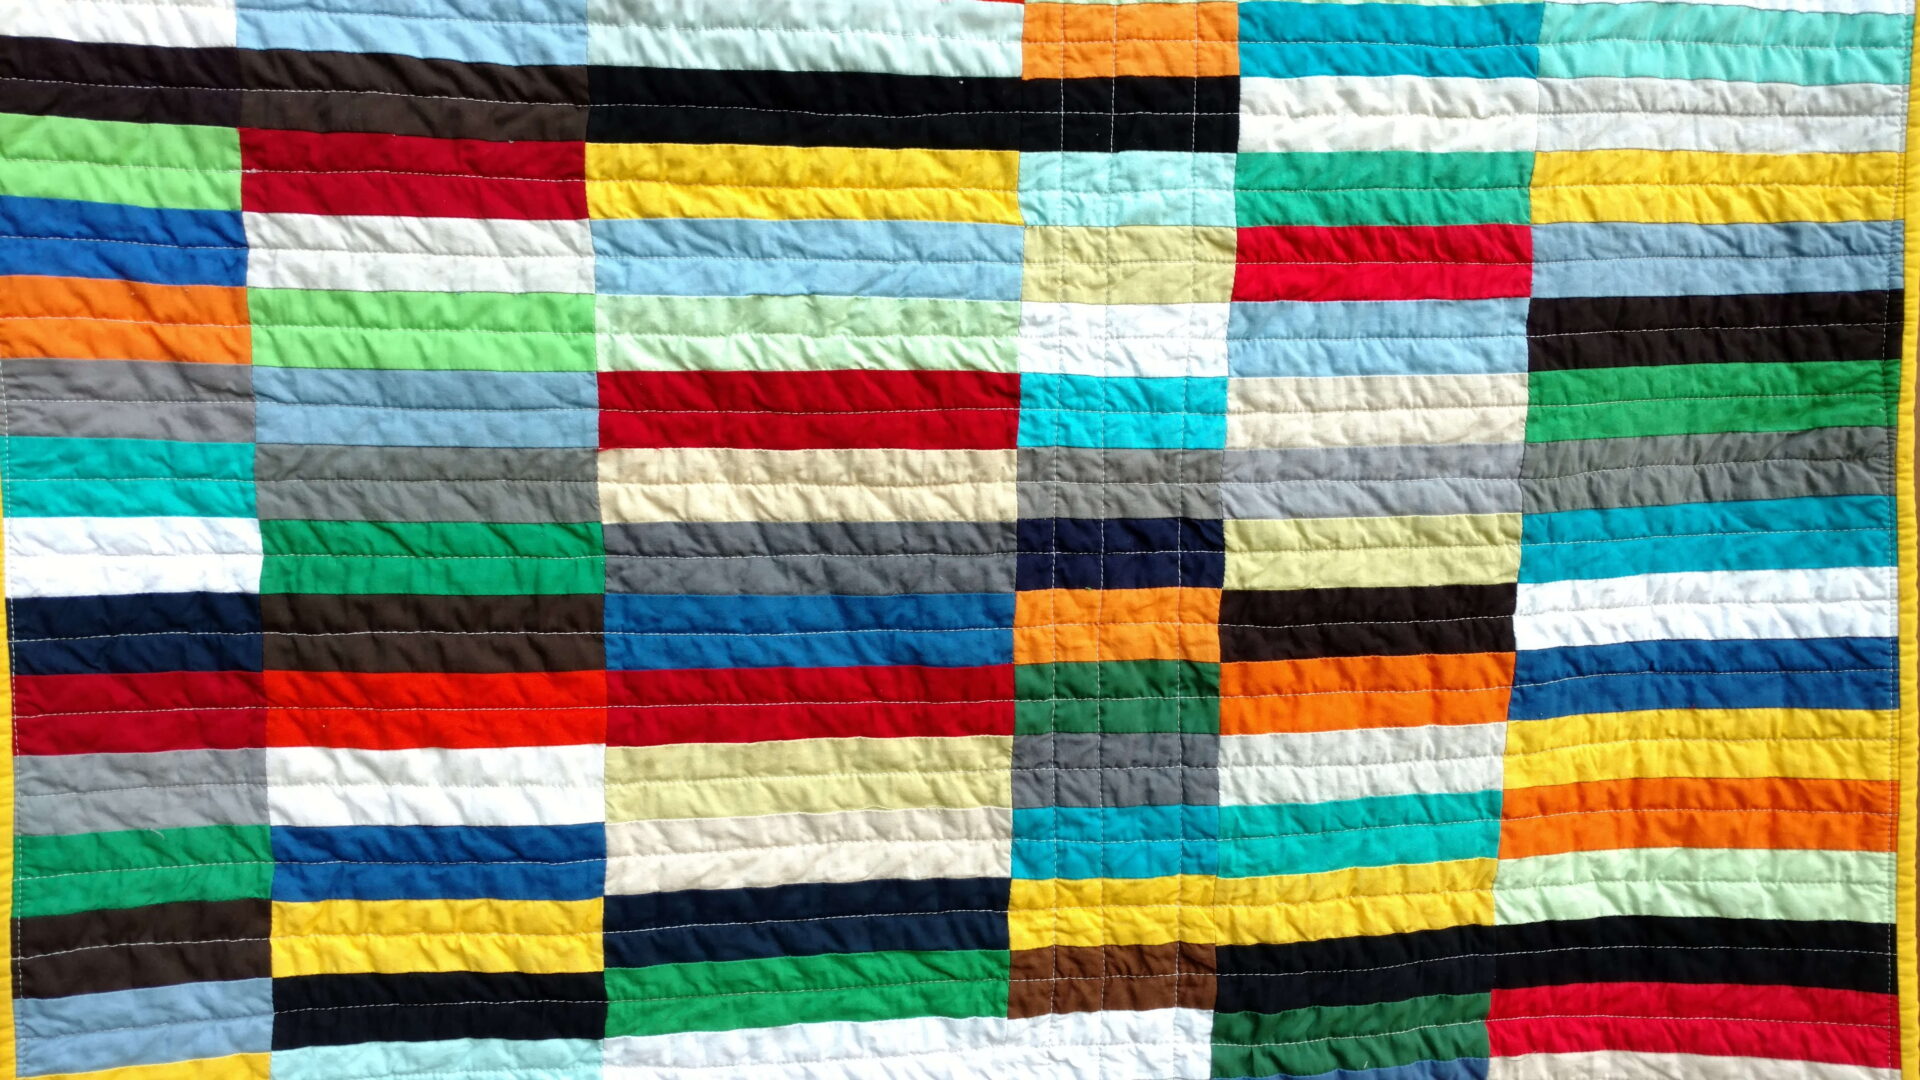
The quilt is randomly pieced, but I knew for the quilting exactly what I wanted. Straight lines in a light gray horizontally in the middle of each row. A few lines in the middle 5 inch strip vertically. In your version quilt as desired.
The secondary shapes created with colors being close together was an unintended effect. They could have been moved, but then the random process is lost. That was more important to me as I just wanted to create.
Finally, I grabbed Corn Yellow Kona Solid I have had forever to create the binding. The binding was 2.5 inch double fold and completely machine bound.
Final Thoughts
Love all the crinkles in this quilt after it was washed. Wonder what the rows would look like in an ombre?
This quilt is currently on the way to a new home. Check out my other quilts using just solids below. The solids scrap bin is still too full.
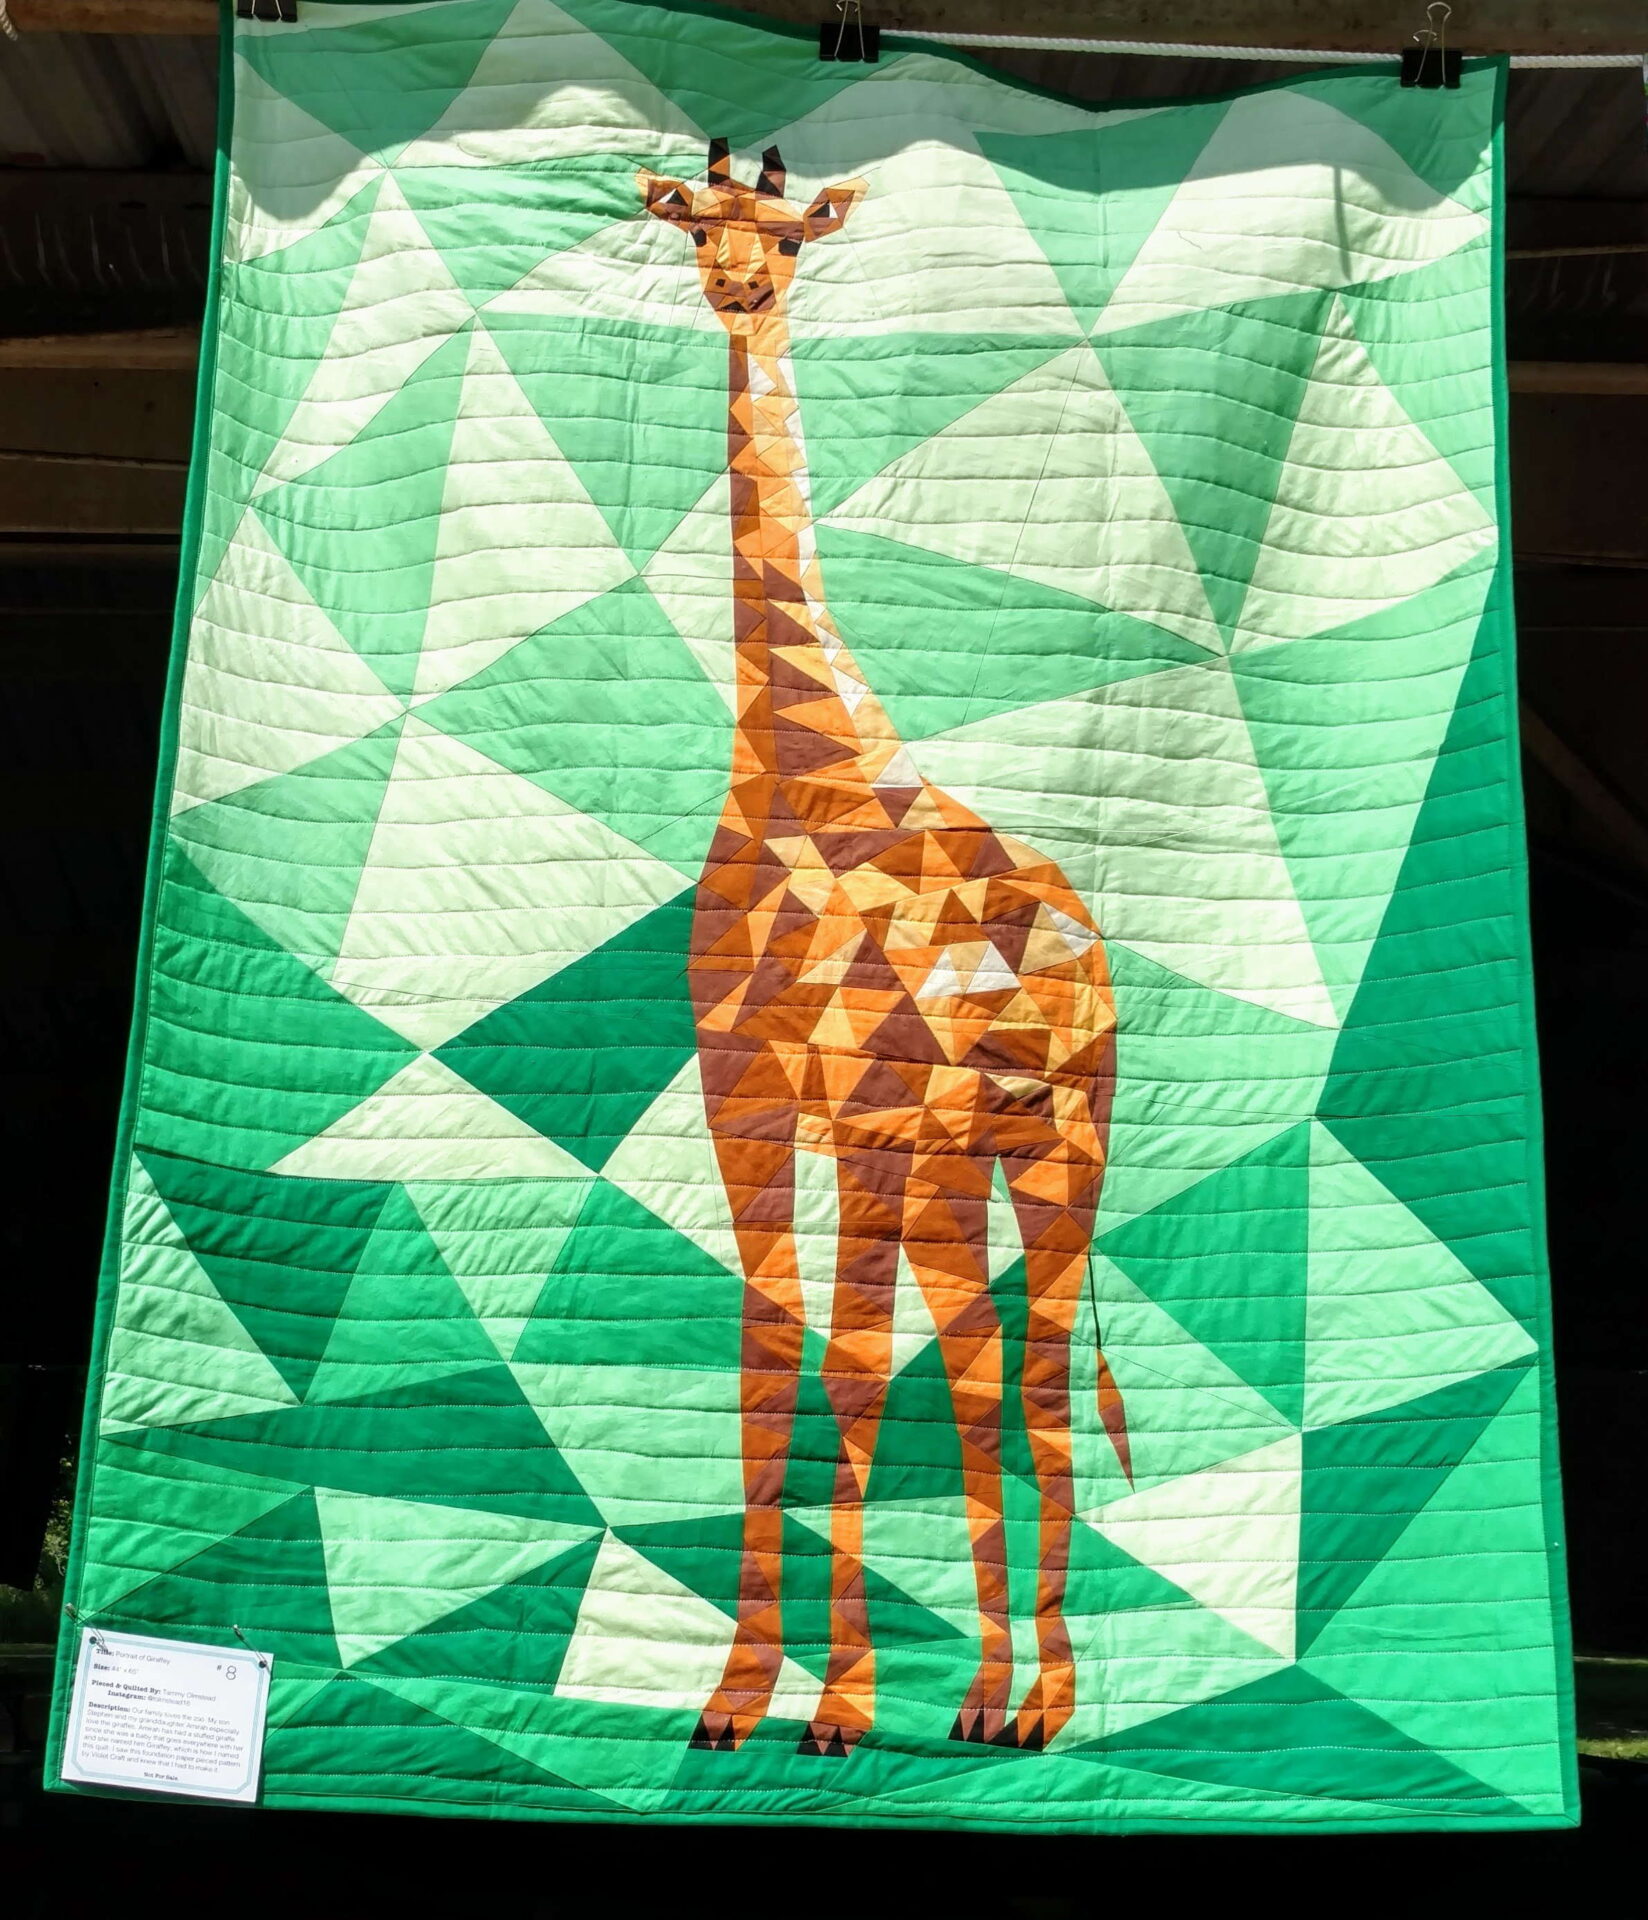
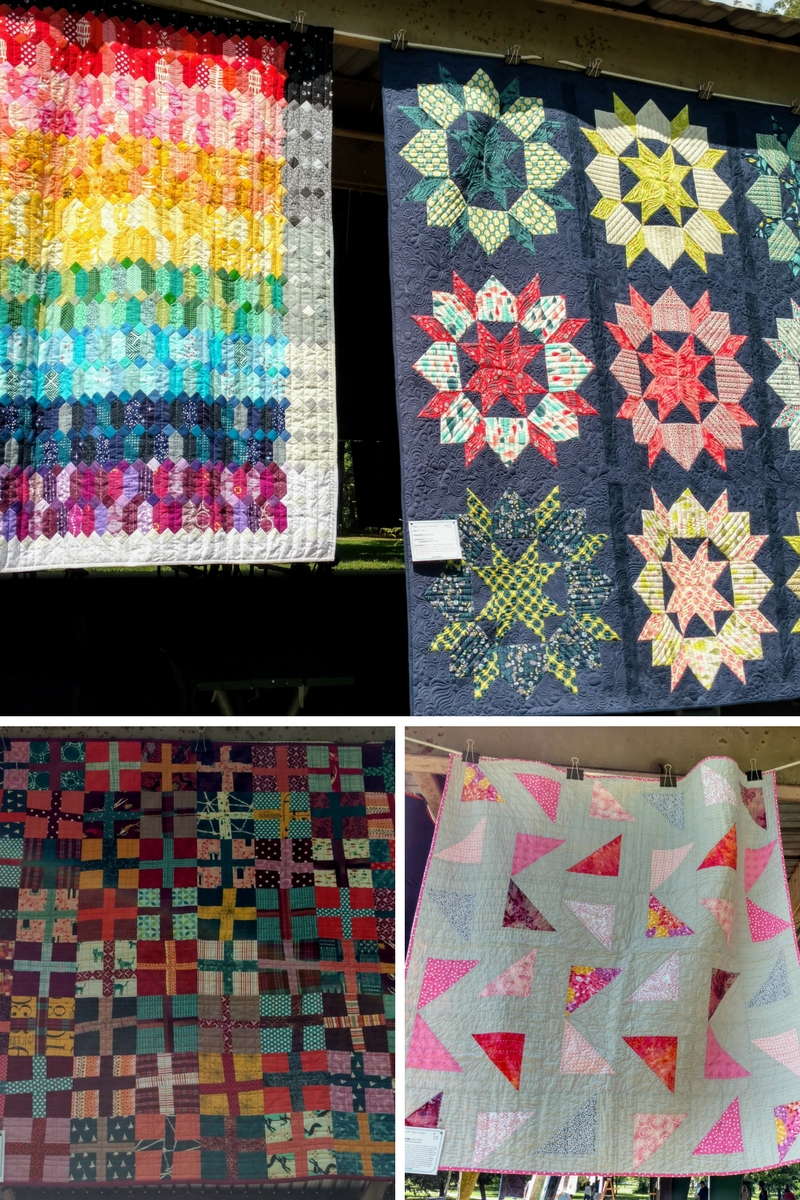
The Indianapolis Modern Quilt Guild is filled with talented quilters. The range of work is impressive and stunning. On Sunday, August 20th, IMQG hosted their 2nd Annual Quilt Show. We rent the giant pavilion at Broad Ripple Park and hang our quilts. It’s a free show that is open to the public.
Sunday’s weather was gorgeous. I was going to post pictures of all the quilts, but one side of the show didn’t photograph as well. The sun was shining bright and provided an interesting reflection in my pictures. The goal is promote modern quilting and introduce people to the idea.
One mom on the playground nearby noted, “I didn’t know what modern quilting was. The quilts are amazing. Wait, you made one? Awesome!”
Attendees were asked to pick their favorite for a People’s Choice Award. As of today, the winner has not been announced. This quilt won my vote. So much detail and who doesn’t love a giraffe?